A Complete Guide to Building a Payment App: Features, Steps, and Best Practices
The way we transact has been fundamentally revolutionized. Gone are the days of being reliant solely on cash or physical cards. Today, a world of financial exchange fits snugly in our pockets, accessible through a few taps on a smartphone. Payment apps like PayPal, Venmo, Cash App, and a multitude of banking solutions have become ubiquitous, offering unparalleled convenience, speed, and security.
This massive shift in consumer behavior presents a golden opportunity for businesses, entrepreneurs, and financial institutions. Whether you’re a startup looking to disrupt the market or an established business seeking to integrate seamless payments, building a payment app is a complex but highly rewarding endeavor.
This guide serves as your comprehensive blueprint. We will deconstruct the entire process, from initial ideation to post-launch growth, covering essential features, a detailed step-by-step development process, critical best practices, and an overview of the associated costs.
Part 1: Deconstructing a Payment App – Core and Advanced Features
A successful payment app is more than just a transfer mechanism; it’s a trusted financial gateway. Its feature set must be built on a foundation of security and usability. We can categorize features into three tiers: Essential, Standard, and Advanced.
Tier 1: The Non-Negotiable Essentials
These are the features without which your app simply cannot function.
- User Authentication & Authorization: The first line of defense.
- Secure Login: Email/phone and password, with mandatory Multi-Factor Authentication (MFA) via SMS or authenticator apps.
- Biometric Authentication: Fingerprint (Touch ID) and facial recognition (Face ID) for seamless and secure access.
- PIN Code: An additional layer of security for confirming transactions or opening the app.
- User Profile & KYC Verification:
- Profile Management: Users must be able to view and edit personal details.
- KYC (Know Your Customer) Integration: This is a legal requirement. You must verify user identities to prevent fraud and money laundering. This involves integrating with services that can verify government-issued IDs, passports, and sometimes even a live selfie for liveness detection.
- Linking Payment Methods: The core functionality.
- Bank Account Linking: Using secure APIs like Plaid or Yodlee to allow users to connect their bank accounts without manually entering routing and account numbers.
- Debit/Credit Card Linking: The ability to add cards by scanning them with the camera or manually entering details. This requires a PCI-DSS compliance commitment.
- Core Transaction Engine:
- Peer-to-Peer (P2P) Transfers: Sending and receiving money to/from contacts using their phone number, email, or a unique $username.
- Transaction History: A clear, searchable, and categorized ledger of all incoming and outgoing transactions.
- Security Infrastructure (The Backbone):
- End-to-End Encryption (E2EE): Ensures data is encrypted from the sender’s device to the recipient’s device.
- Tokenization: Replaces sensitive card data with a unique, meaningless “token.” Even if your system is breached, the actual card numbers are safe.
- Fraud Detection Systems: AI and rule-based systems that monitor for suspicious activity (e.g., unusually large transfers, rapid transactions in different locations) and can trigger alerts or block transactions.
Tier 2: Standard Expected Features
These features are what users have come to expect from a modern payment app. They significantly enhance the user experience.
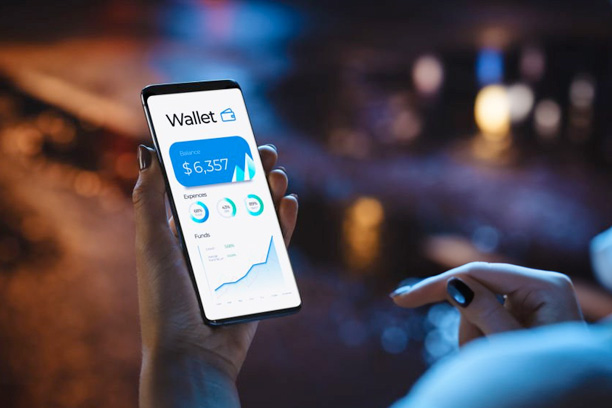
- Digital Wallet:
- Balance: Showing the current balance of funds held within the app.
- Top-Up/Withdrawal: Adding money from a linked bank account/card to the app’s wallet and cashing out from the wallet to the bank.
- Notifications: Real-time alerts for successful transactions, received payments, security alerts, and promotional offers. Push notifications and emails are crucial.
- Contact Integration & Management: Allowing users to sync their phone’s contacts to easily find people who are also on the platform. This includes an invitation system for contacts not yet using the app.
- Bill Splitting & Requesting Money: A social feature that allows users to split a bill evenly or by custom amounts and send polite payment requests to friends.
- Customer Support: Easy access to help through in-app chat (with bots and human agents), a comprehensive FAQ section, and email support.
Tier 3: Advanced & Differentiating Features
This is where you can innovate and stand out from competitors like Venmo or Cash App.
- Cryptocurrency Integration: Allowing users to buy, sell, hold, and even send/receive Bitcoin and other major cryptocurrencies.
- Investment Features: Offering access to stock trading, ETFs, or fractional shares, turning your payment app into a broader financial platform.
- Bill Pay: A system to schedule and pay utility, credit card, and other bills directly from the app.
- Merchant Payments & QR Codes: Generating static or dynamic QR codes that can be scanned by merchants for in-store payments. This opens up the B2B side of your business.
- International Transfers & Multi-Currency Support: Enabling cross-border payments with competitive exchange rates and low fees. This is complex due to varying regulations.
- Loyalty Programs & Cashback: Rewarding users with cashback on certain transactions or points that can be redeemed.
- Budgeting & Financial Insights: Using AI to analyze spending habits, categorize transactions, and provide users with insights and budgeting tools.
Part 2: The Step-by-Step Guide to Building Your Payment App
Building a fintech product is a marathon, not a sprint. It requires meticulous planning and execution.
Step 1: Ideation, Market Research, and Defining Your Niche
Before writing a single line of code, you must answer fundamental questions:
- Problem: What specific problem are you solving? (e.g., “International remittances are too expensive,” “Teens need a simple way to manage money”).
- Target Audience: Who are you building for? (e.g., millennials, freelancers, small businesses, the unbanked).
- Competitive Analysis: Who are your competitors? Analyze their apps. What do they do well? Where do they fail? This is your opportunity to differentiate.
- Monetization Strategy: How will the app make money? Common models include:
- Transaction fees (% or fixed fee per transfer)
- Interchange fees (a cut of card processing fees)
- Subscription fees for premium features
- Withdrawal fees (for instant transfers to a bank)
- Merchant fees (charging businesses for payments)
- Interest on stored balances
Step 2: Navigating the Legal and Regulatory Landscape
This is the most critical and often most daunting step. Non-compliance can result in massive fines and shutdowns.
- Choose a Legal Structure: Decide if you will be a licensed financial institution, partner with one, or operate under a specific regulatory framework.
- Obtain Licenses: The required licenses depend on your region and operation.
- USA: You will likely need Money Transmitter Licenses (MTL) on a state-by-state basis. This is a lengthy and expensive process.
- EU: You must comply with the Payment Services Directive (PSD2), which requires authorization as a Payment Institution (PI) or E-Money Institution (EMI).
- Compliance:
- KYC/AML: Implement robust Anti-Money Laundering (AML) and Know Your Customer (KYC) procedures.
- PCI DSS: If handling card data, you must comply with the Payment Card Industry Data Security Standard. Using a certified third-party processor (like Stripe or Braintree) outsources much of this burden.
- Privacy Laws: Ensure compliance with GDPR (in Europe), CCPA (in California), and other data protection regulations.
Expert Tip: Engage with a legal firm specializing in fintech from day one.
Step 3: Choosing the Technology Stack and Partners
You don’t have to build everything from scratch. Leveraging third-party APIs is cost-effective and secure.
- Backend: Node.js, Python (Django), Java (Spring Boot), or Ruby on Rails for building robust and scalable server-side logic.
- Frontend:
- Native: Swift (for iOS), Kotlin/Java (for Android) for maximum performance.
- Cross-Platform: React Native or Flutter to build for both platforms with a single codebase, saving time and cost.
- Database: PostgreSQL, MySQL (reliable SQL databases), or MongoDB (for NoSQL flexibility).
- Critical Third-Party Services:
- Payment Processing: Stripe, Braintree, Adyen. They handle card payments, compliance (PCI DSS), and international payments.
- Bank Linking: Plaid, Yodlee, Teller. They provide seamless and secure authentication for bank account linking.
- Cloud Infrastructure: AWS, Google Cloud Platform, or Microsoft Azure. They offer secure, scalable, and reliable hosting with built-in security tools.
- KYC/AML Verification: Onfido, Jumio, Veriff. They provide identity verification and document authentication via AI.
- Push Notifications: Firebase Cloud Messaging (FCM), OneSignal.
- Customer Support: Zendesk, Intercom.
Step 4: UI/UX Design – The Art of Simplicity and Trust
The design must be intuitive and inspire confidence.
- User Flow Mapping: Diagram every single step a user takes, from onboarding to completing a transaction. Eliminate any unnecessary friction.
- Wireframing & Prototyping: Create low-fidelity wireframes and high-fidelity interactive prototypes. Tools like Figma, Sketch, or Adobe XD are industry standards.
- Security as a Design Feature: Use visual cues to reinforce security. Display logos of security partners, use confirmation screens with clear transaction details, and provide clear records of activity. Transparency builds trust.
Step 5: Agile Development and Rigorous Testing
- Development: Adopt an Agile methodology. Break down the project into sprints (2-3 week cycles), building and reviewing features incrementally. Start with an MVP (Minimum Viable Product)—a version with just the core features to validate your idea in the market.
- Testing: This cannot be overstated.
- Functional Testing: Does every button work as intended?
- Security Testing: Conduct penetration testing and vulnerability assessments. Hire ethical hackers to try and break your system.
- Performance Testing: How does the app behave under load (e.g., 10,000 simultaneous transactions)?
- UX Testing: Conduct beta tests with real users from your target audience. Gather feedback on usability and clarity.
- Compliance Audit: Have your code and processes audited to ensure regulatory compliance.
Step 6: Deployment and Post-Launch Strategy
- App Store Submission: Prepare all necessary materials (descriptions, screenshots, privacy policies) for submission to the Apple App Store and Google Play Store. Their review processes can be strict, especially for financial apps.
- Server Deployment: Deploy your backend infrastructure to your chosen cloud provider, ensuring it’s configured for scalability and security.
- Monitoring & Analytics: Implement tools like Google Analytics for Firebase or Mixpanel to track user behavior, feature adoption, and drop-off points. Use monitoring tools like Datadog or Sentry to track app performance and crashes in real-time.
- Marketing & User Acquisition: Utilize ASO (App Store Optimization), content marketing, social media, and potentially paid advertising to attract your first users.
- Iterate and Improve: The launch is just the beginning. Use the analytics and user feedback you collect to prioritize new features, fix bugs, and continuously improve your app.
Part 3: Best Practices for Success
- Security First, Second, and Third: Never compromise on security. It is the cornerstone of user trust. Invest in the best encryption, conduct regular audits, and be transparent about your security measures.
- Prioritize a Frictionless User Experience (UX): Every extra step in a transaction is an opportunity for a user to drop off. Make registration, adding money, and sending payments as smooth as possible.
- Build for Scalability from Day One: Assume your app will be a wild success. Design your architecture (especially databases and servers) to handle a rapidly growing user base and transaction volume without crashing.
- Transparency is Key: Be crystal clear about your fee structure. Hidden fees are a primary reason users abandon financial apps. Also, be transparent in your communication, especially during outages or security incidents.
- Provide Exceptional Customer Support: Financial issues are stressful. Offer quick, helpful, and human customer support. This builds immense loyalty and trust.
Part 4: Understanding the Cost
The cost to build a payment app is highly variable, ranging from $100,000 for a simple MVP to $500,000+ for a full-featured, market-ready product with advanced functionality. Key cost factors include:
- App Complexity & Feature Set (The biggest factor)
- Platform (Native vs. Cross-Platform)
- Location and Rates of Your Development Team (North America vs. Eastern Europe vs. Asia)
- Third-Party Service Costs (Licenses, API fees, cloud hosting, compliance)
- Post-Launch Expenses (Marketing, maintenance, updates, customer support)
Conclusion
Building a payment app is a formidable challenge that intertwines cutting-edge technology with strict legal frameworks. However, the opportunity to create a product that sits at the center of people’s financial lives is immense. Success hinges not on a single feature, but on a unwavering commitment to security, a maniacal focus on user experience, and a rigorous adherence to compliance.
By following this structured guide—validating your idea, navigating regulations, choosing the right technology, designing with empathy, and committing to continuous improvement—you can navigate this complexity and build a payment application that is not only functional but also trusted and transformative. The future of finance is digital, and the tools to build it are in your hands.
Let's Try! Get Free Quote
Get Started Today
Want to transform your web vision into reality? Contact us today to explore your development needs. Let's create something extraordinary together.